Author: wilhoshtfprepperfamily

Cheapest Way to Make a Vegetable Garden

The cheapest way to make raised garden beds typically involves using materials that are readily available or repurposed. Always check what kind of wood you’re using. While it’s controversial, I personally don’t believe in using treated wood for garden beds.

Fallen Wood or Cut Down Trees:

We are using trees from around our property to construct our beds while using pine straw as mulch.

This means the only thing we’ve paid for is a truckload of compost and seeds.

Wooden Pallets:

Pallets can often be obtained for free or at a very low cost from local businesses. They can be deconstructed and the wood can be used to build simple raised beds.

Cinder Blocks:

Cinder blocks or bricks are relatively inexpensive and can be stacked to create raised beds. They require no assembly and can be configured in various shapes and sizes.

Untreated Lumber:

Using untreated lumber, such as pine or cedar, can be cost-effective for building raised beds. Look for sales or discounted lumber at hardware stores.

Reclaimed or Salvaged Wood:

Look for discarded or reclaimed wood from construction sites, old furniture, or shipping pallets. With a bit of cleaning and treatment, this wood can be repurposed for raised beds.

Corrugated Metal Sheets:

Corrugated metal sheets can be used to construct durable and long-lasting raised beds.

Look for salvaged metal or inquire about factory seconds for a cheaper option.

Repurposed Materials:

Get creative with repurposing materials such as old tires, barrels, or even large plastic containers. These can be filled with soil to create raised planting beds.

Lasagna Gardening or Sheet Mulching (NO Dig):

Instead of building traditional raised beds, you can create raised planting areas directly on the ground using layers of organic materials like cardboard, newspaper, leaves, and compost.

This method requires minimal investment in materials and is what we’re using on our homestead.

Community Resources:

Check with local community centers, gardening clubs, or recycling centers for resources or materials that are being discarded or offered for free.

When choosing materials, ensure they are safe for growing food, especially if you plan to grow vegetables or herbs. Avoid treated lumber or any materials that may leach harmful chemicals into the soil. If I can do this, you can too!

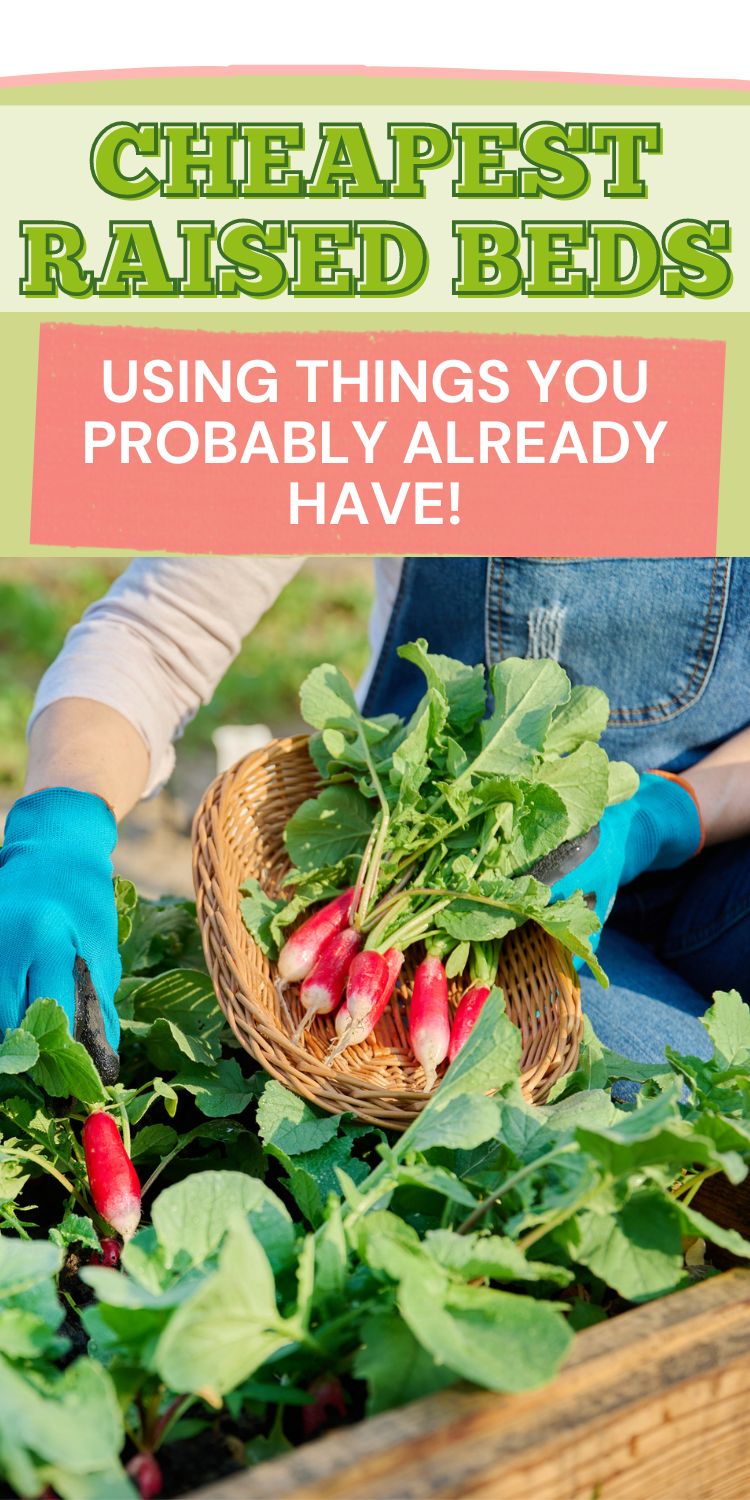
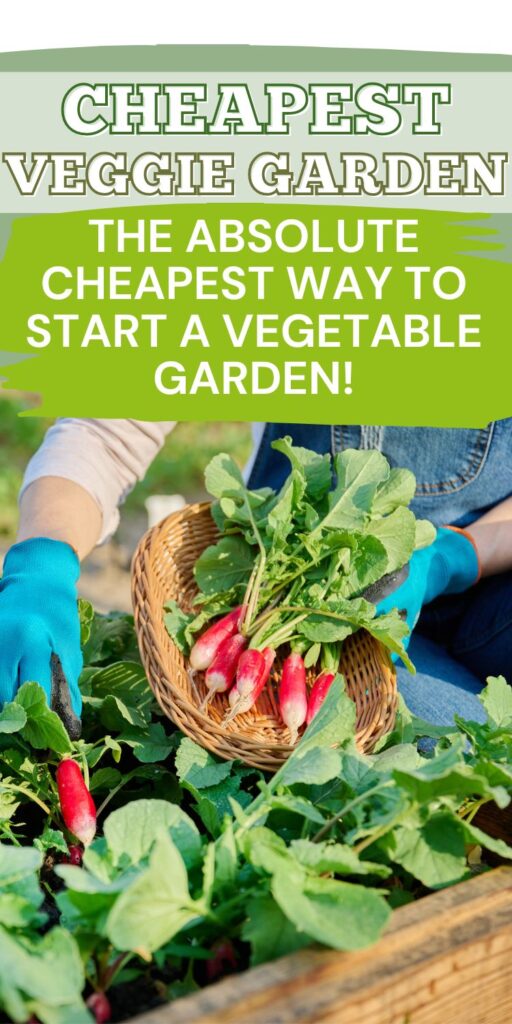
woman tending to vegetables in a raised bed - text overlay reads "cheapest raised beds - using things you probably already have!"

Prepping Supplies to Buy at the Dollar Store

Dollar stores can be great places to find affordable supplies for doomsday prepping. Here are some items commonly available at dollar stores that can be valuable for prepping:

Non-Perishable Food:

While it might seem kind of gross to buy food at the dollar store, they often have the best unit price on things like rice and dried beans. 

Be sure to check expiration dates and compare prices at your other local grocery stores…but often, my dollar store is the best unit price on these food items:

Canned goods (such as vegetables, beans, and meats)

Pasta, rice, and other grains

Packaged snacks (granola bars, nuts, dried fruits)

Water Storage and Purification:

Bottled water

Mason Jars (if you have to store them anyway, store them filled with filtered water!)

Emergency Supplies:

Flashlights and batteries

Candles and matches/lighters

Emergency blankets or space blankets

Glow sticks

First Aid and Medical Supplies:

Basic first aid kits

Bandages, gauze pads, and medical tape

Antiseptic wipes or alcohol pads

Over-the-counter medications (pain relievers, antihistamines)

Hygiene and Sanitation:

Hand sanitizer

Wet wipes

Toilet paper

Disposable gloves

Tools and Supplies:

Multi-purpose tools (such as screwdrivers or pocket knives)

Duct tape

Rope or twine

Ziploc bags (for organizing and waterproofing items)

Cooking and Eating Utensils:

Disposable plates, bowls, and utensils

Aluminum foil

Disposable lighters or matches

Miscellaneous Supplies:

Notepads and pens

Whistles

Tarps or plastic sheeting

Gardening supplies (seeds, small pots, gardening tools)

While dollar stores carry lots of junk that you wouldn’t want to rely on in a SHTF scenario, they also carry lots of name brand, well-built items if you know what you’re looking for. Don’t spend more money to buy the same thing elsewhere. The dollar store is a hidden gem for prepping supplies if you know where to look!

Prepper Items to Buy at Yard Sales

Yard sales can be treasure troves for doomsday preppers. When I was a kid, flea markets had tons of things that I’d love to have today. While garage sales and yard sales may not be as amazing as they once were, I have definitely seen tons of useful prepping supplies for dirt cheap – even in 2024. Here are some items commonly found at yard sales that can be valuable for doomsday prepping:

  1. Tools:
    • Hand tools (e.g., hammers, screwdrivers, wrenches)
    • Multi-tools or Swiss Army knives
    • Shovels, axes, and other outdoor tools
  2. Camping Gear:
    • Tents, sleeping bags, and sleeping pads
    • Camp stoves and portable grills
    • Lanterns, flashlights, and headlamps
    • Backpacks and hydration packs
  3. Survival Gear:
    • Water purification tablets or filters
    • Fire-starting tools (e.g., lighters, waterproof matches, flint and steel)
    • Portable solar chargers for electronic devices
    • Emergency blankets and tarps
  4. Food Preservation Supplies:
    • Canning jars and lids
    • Food dehydrators
    • Vacuum sealers and bags
  5. Outdoor Clothing and Footwear:
    • Sturdy boots and hiking shoes
    • Weatherproof jackets and pants
    • Hats, gloves, and socks suitable for outdoor activities
  6. Water Storage Containers:
    • Large water containers or barrels
    • Water jugs and canteens
  7. Medical Supplies:
    • First aid kits and supplies
    • Over-the-counter medications (check expiration dates)
    • Bandages, gauze, and medical tape
  8. Miscellaneous Supplies:
    • Rope, paracord, and bungee cords
    • Maps and compasses
    • Hand-crank or solar-powered radios

When shopping at yard sales for doomsday prepper supplies, it’s always a good idea to inspect items carefully to ensure they are in good condition and functioning properly. Also, always be thinking ahead. While I thought I wouldn’t need a garden hoe for a long time, I am now in need of one and can’t for the life of me find one at our local flea market.

OTC Medicines to Stockpile

Stockpiling over-the-counter (OTC) medicines for emergencies can be a prudent measure to ensure you have basic medical supplies on hand when needed. Here’s a list of commonly recommended OTC medicines to consider:

  1. Pain and Fever Relief:
    • Acetaminophen (Tylenol)
    • Ibuprofen (Advil, Motrin)
  2. Allergy Relief:
    • Antihistamines (e.g., loratadine, cetirizine)
    • Decongestants (e.g., pseudoephedrine, phenylephrine)
  3. Cough and Cold:
    • Cough syrup or lozenges
    • Decongestants
    • Expectorants (e.g., guaifenesin)
    • Antihistamines for allergy-related symptoms
  4. Digestive Health:
    • Antacids (e.g., Tums, Rolaids)
    • Anti-diarrheal medication (e.g., loperamide)
    • Fiber supplements or laxatives for constipation
  5. Topical Ointments and Creams:
    • Hydrocortisone cream (for itching and skin irritation)
    • Antibiotic ointment (e.g., Neosporin) for minor cuts and burns
    • Calamine lotion for rashes and insect bites
  6. First Aid Supplies:
    • Bandages, gauze pads, adhesive tape
    • Alcohol wipes or hydrogen peroxide for wound cleaning
    • Tweezers for removing splinters
    • Instant cold packs for minor injuries
  7. Eye and Ear Care:
    • Eye drops (artificial tears)
    • Ear drops for earaches or wax buildup
  8. Oral Health:
    • Toothpaste and toothbrushes
    • Dental floss
    • Oral pain relief gel (e.g., benzocaine)
  9. Miscellaneous:
    • Antifungal creams (for athlete’s foot or yeast infections)
    • Motion sickness medication (e.g., dimenhydrinate)
    • Electrolyte solutions or rehydration packets (for dehydration)

Remember to check expiration dates regularly and replace any expired medications. Additionally, consult with a healthcare professional or pharmacist for personalized recommendations based on your medical history and needs.

Vegetable Garden Layouts for Small Backyards

Designing a vegetable garden layout for a small backyard requires careful planning to maximize space and productivity. With a little strategy, you can even make a vegetable garden in the margins of your yard so the little space you do have is still usable for playing and entertaining. Here are some of the best vegetable garden layouts for small spaces:

Square Foot Gardening:

Originally developed by Mel Bartholomew, this is my absolute favorite method on this list.

When I read his book, I just kept thinking “why didn’t I think of this?”

It just makes sense and is so much more efficient than traditional gardening.

To start, divide your garden into square-foot sections using wooden planks or string.

Each square foot can host a different vegetable or herb.

This method maximizes space utilization and makes it easier to manage.

Vertical Gardening:

In our backyard, we combine vertical gardening with square foot gardening.

When you’re short on space, there’s nowhere to go but up.

Utilize vertical space by growing climbing vegetables such as beans, peas, cucumbers, and tomatoes on trellises or vertical structures.

Hanging baskets can also be used for herbs and small vegetables.

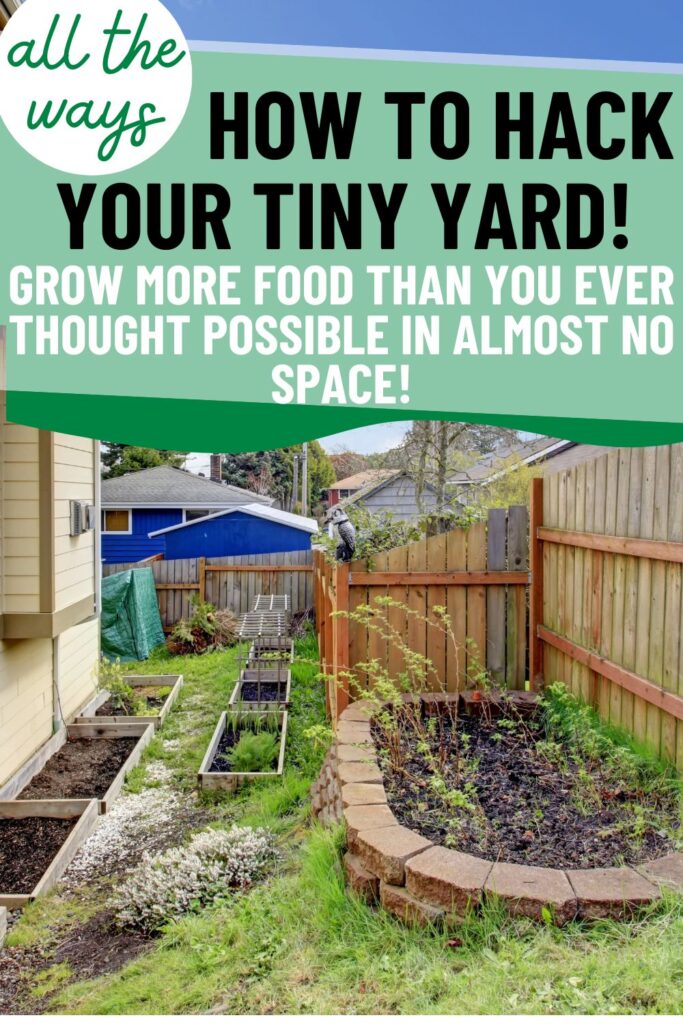
raised beds in small backyard. Text overlay reads "all the ways:  How to hack your tiny yard! Grow more food than you ever thought possible in almost no space!"

Container Gardening:

We live in zone 9a, so the only way to grow some things is in containers.

This year, we’re trying to grow dwarf mango plants in containers and will bring them in and out as necessary.

Grow vegetables in containers such as pots, buckets, or raised beds.

This method is versatile and allows you to place plants strategically to optimize sunlight exposure.

Keyhole Garden:

This is one method I haven’t personally tried, but others swear by it so I thought it deserves a spot on this list.

This circular raised bed design features a center composting basket, surrounded by planting beds.

It maximizes growing space while minimizing the need for pathways, making it ideal for small yards…especially if you plan to create your own compost.

Edible Landscape:

One of the best pieces of gardening advice I’ve ever heard is “you can’t eat the grass.”

Especially in recent years with costs skyrocketing – it just makes sense to try to grow as much of our own food as possible.

In our home, we’d rather have dwarf fruit trees than trees that are simply aesthetically pleasing.

Incorporate vegetables into your existing landscaping, mixing them with ornamental plants.

This approach combines aesthetics with functionality, turning your entire yard into a productive space.

When planning your vegetable garden layout, consider factors such as sunlight exposure, soil quality, water access, and the specific needs of the plants you want to grow. I will encourage you though, start as cheap and as SOON as possible. You can’t grow what you don’t plant. Experiment with different layouts to find the one that works best for your small backyard.

How to Regrow Vegetables from Scraps

Regrowing vegetables from scraps in your kitchen is a fun and sustainable way to reduce food waste and enjoy fresh produce. Plus it makes me feel less guilty to spend more on organic when I know it’s something I can regrow for even more food at home. Here’s a general guide on how to regrow some common vegetables:

Regrow Lettuce, Cabbage, and Bok Choy:

  • Green Onions:
    • Save the bottom inch with the roots intact.
    • Place them in a glass with enough water to cover the roots.
    • Change the water every few days.
    • They will regrow quickly, and you can continue harvesting them as needed.

Regrow Celery, Carrots, and Garlic

  • Celery:
    • Cut off the base of the celery bunch.
    • Place the base in a shallow dish of warm water, ensuring the cut side is down.
    • Change the water every day or two.
    • New leaves will begin to emerge from the center.
    • Once you see significant growth, transplant it into soil.
  • Carrots:
    • Save the top inch or two of a carrot with some greens attached.
    • Place them in a shallow dish of water, ensuring the cut end is submerged.
    • Change the water regularly to prevent rot.
    • You should see new greens sprouting from the top within a few days.
  • Garlic:
    • Save a clove with the skin intact.
    • Plant it in soil with the pointed end facing up, about an inch below the surface.
    • Keep the soil consistently moist.
    • Garlic will begin to sprout and grow into a new bulb.

How to Regrow Potatoes

  • Potatoes:
    • Cut a potato into chunks, making sure each piece has at least one eye.
    • Allow the pieces to dry for a day or two to prevent rotting.
    • Plant the pieces in soil with the eyes facing up, about 4-6 inches deep.
    • Keep the soil evenly moist, and new potato plants will sprout from the eyes.

Remember that while regrowing vegetables from scraps is an enjoyable and sustainable practice, not all vegetables will regrow successfully. Additionally, some vegetables may take longer to regrow than others, so patience is key. Enjoy your gardening adventure!

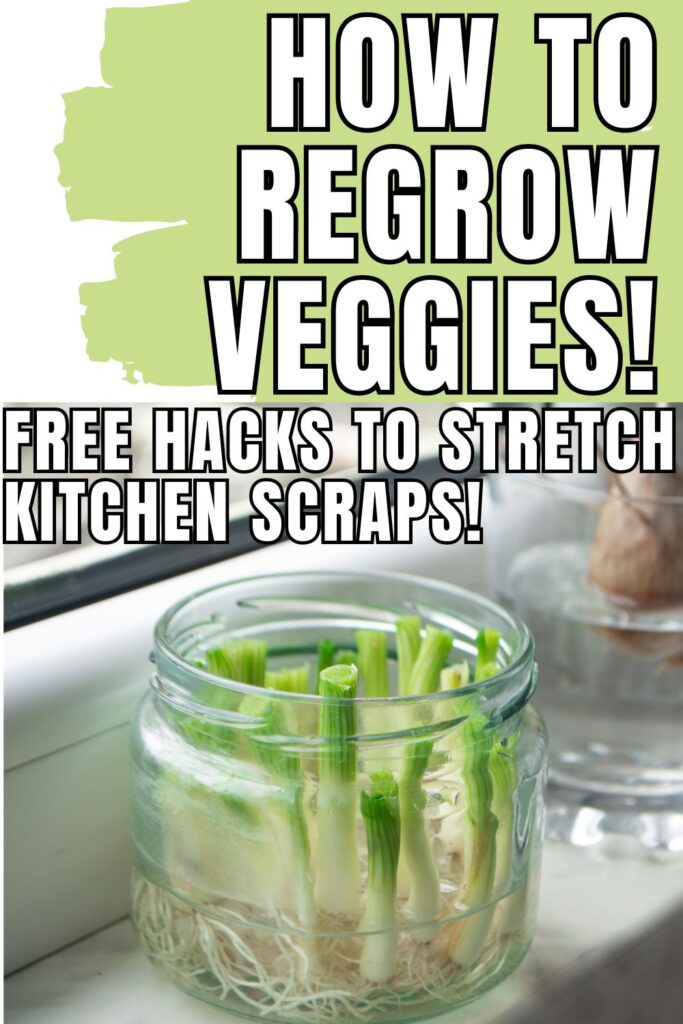
onions and potatoes regrowing on kitchen counter

How to Stockpile on a Budget

Whether you’re just starting to build a stockpile to help combat ever-rising grocery costs or if you have a preppers heart and are determined to finally get started, a stockpile is always a great idea. It can be hard to afford weekly groceries though, let alone have enough money left over to build up a nice sized preppers pantry. Building a stockpile might sound overwhelming and expensive, but even if you only have $5 extra a month to put toward long term food storage, it can absolutely be done. Always remember that a prepper’s pantry is never ever done, is always a work in progress, and that any stockpile at all is a million times better than no stockpile. Let’s get started!

The Best Way to Start Your Stockpile

Starting a stockpile doesn’t mean you have to empty your bank account.

The key is to take small steps and make the most of every great deal you find.

My husband always says “one for now, one for later.” Truly the best way to start your stockpile is to just start.

When you go grocery shopping for your weekly groceries, take a look at your list.

Are you buying two cans of chili beans to use this week? Throw 4 or 6 in the cart instead. Notice a sale on meat? Stock your freezer as much as your stockpile budget will allow.

Meal Plans and Food Items – Your Stockpile Master List

Creating meal plans is a great way to build your stockpile of food items strategically.

Plan your meals around what’s on sale, and you’ll save a whole lot in the long run.

Keep a list of things you need and want in your stockpile to avoid impulse buys at full price.

When I’m considering what to buy every month, I always price compare as I go. It has literally never been easier.

I compare my Walmart app to Azure Standard, Publix, and Winn Dixie sales.

Often Azure Standard is the cheapest for things like organic flour or frozen berries.

Sometimes Publix, our most expensive grocery store, blows everyone else out of the water with BOGO sales.

Stock up on what’s on sale but always have a running list of what you want. Chip away at it as you can.

Building Your Stockpile on a Tight Budget

Arguably, the cheapest way to start a stockpile is to just buy huge bags of rice and beans.

While this will keep you alive, it will be a boring survival situation should you ever need to use them.

Look at what your family eats on a regular basis that is already shelf stable. Pick up more of those as your budget allows.

If you have an extra $25 to throw at stockpiling, you can actually build up quite a pantry in a short amount of time.

I’m writing this in 2023 when prices are completely out of control and I still find this to be the case.

Buying in bulk at a place like Sam’s Club can save you big bucks (sometimes, always check unit prices to avoid making a rookie mistake!) and make your stockpile grow in no time.

Stockpile for Emergency Preparedness

Having an emergency stockpile is always a good idea. 

Natural disasters and job loss can hit us unexpectedly, but with a well-established stockpile, you’ll have peace of mind knowing you have enough food and household items to get you through tough times. 2020 made a lot of preppers out of normal every day families. My husband’s “ah ha” moment was when I sent him to the store for toilet paper and canned diced tomatoes and he came home without either. He said “you have no idea what it’s like to have your wife send you to the grocery store for two simple things and have to come home empty handed. I’ll never go through that again.” He immediately bought sturdy wire shelving and started buying two or three extra things each time he went to the store. He really meant what he said that day and there have been so many times since then that it has come in handy. Hurricane Ian is a recent example that comes to mind. Go hard on stockpiling while things are plentiful so you don’t have to be a drain on the system when they’re not.

Smart Stockpiling for Smart Deals

Taking advantage of sales and loss leaders at your local store is a smart move. Create a stockpile fund to make the most of those great deals. Don’t pass up a good sale on things you know you’ll use. Are you sensing a theme here? DON’T stockpile things you don’t already eat! BUT, if your local grocery store has a BOGO sale on your favorite pasta sauce, stock up! Buy a year’s worth if you can. See a clearance rack of dented pasta boxes? Buy what you can

Non-Perishable Items: The Stars of Your Stockpile

Non-perishable items like pasta sauces, peanut butter, and canned goods are the stars of your stockpile.

They have long shelf lives and are versatile in many recipes.

Plus, they’re perfect for stocking up on when they go on sale.

This doesn’t mean to buy the most preservative-laden junk you can find just because it’s shelf stable.

Instead, buy cans and dry goods and learn to store them.

We use Azure Standard for lots of things like flours and oatmeal.

I store them in 5 gallon buckets with gamma lids in our pantry.

Just one purchase of 25 pounds of oatmeal will last our large family months without even trying to stock up.

The Little Planning That Goes a Long Way

With just a little planning, you can save big on your grocery stockpile.

Keep a running list of what your family most likely needs and take advantage of sales to build up your stockpile gradually.

A little bit here and there will add up to a whole lot of savings!

Making the Most of Your Small Space

Even if you live in a small house with not much space, you can still build an impressive stockpile.

Opt for larger packages of stable foods and use every nook and cranny to store your stockpile.

It’s all about making the most of what you have! We live in 1401 square feet with 5 kids and 2 adults in our family.

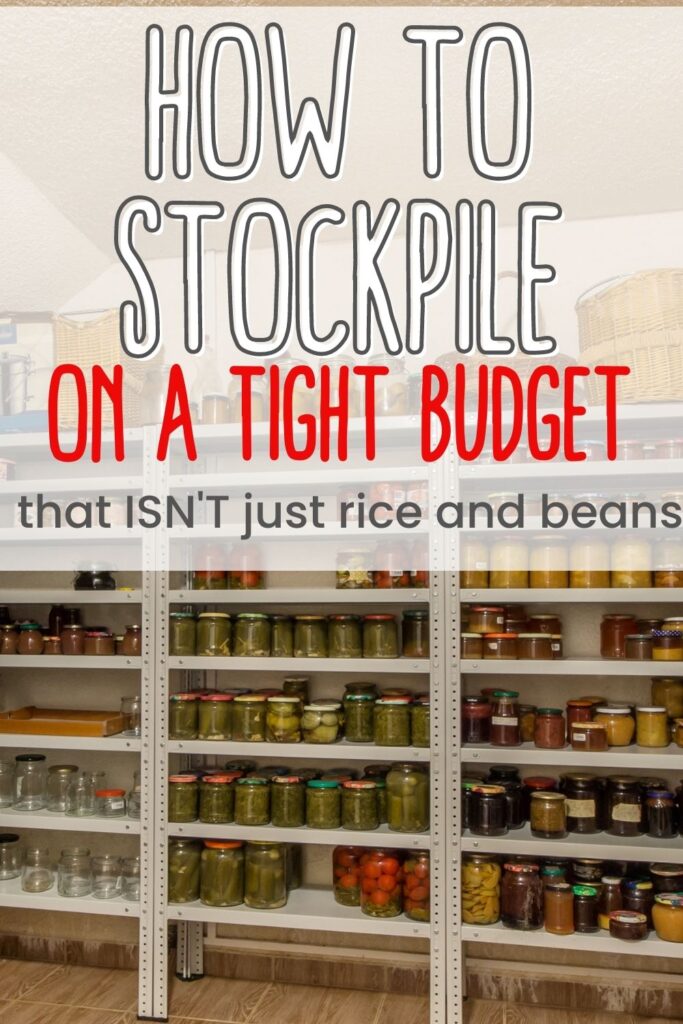
My husband built reinforced shelves in our little pantry and I “stock them to the rafters” as the Canadian Prepper says.

I don’t buy things I know we won’t use just because they’re on sale. I buy what I know we’ll actually eat and I buy a lot of it.

I store it in the places that don’t get used, like that cabinet above the fridge that no one knows what to do with.

“Decant” things (fancy term Youtube made popular.

Means to take things out of their packaging so it takes up less space).

Stockpile for Your Peace of Mind

Having your own stockpile will give you peace of mind during emergencies or food shortages.

With an emergency food supply on hand, you’ll be prepared for any short-term outage that comes your way.

The First Step to a Great Stockpile

The first step to a great stockpile is to focus on non-perishable items.

These are the foundation of your stockpile and will keep for a long time, allowing you to use them later when you need them the most.

Remember though that the rule still applies – eat what you store and store what you eat.

Avoiding Food Waste with Your Stockpile

With smart planning and rotation, you can avoid food waste in your stockpile.

Keep track of expiration dates and use older items first.

This way, you’ll always have fresh foods in your stockpile.

This was a mistake we made when we first got married and started our sorry excuse for “homesteading”.

The foods we purchased were almost like a collection.

We’d buy flats of cans at Aldi and be proud of ourselves for having a stockpile in case of bad winter storms. Instead, we collected a bunch of cans of black beans that we never ate. Create a well thought out stockpile and then rotate through the items in it. Use a couple cans of tomatoes? Pick up at least a couple more when you go back to the store.

How Much Cash Should You Stockpile

This one is hard and obviously most families are just trying to survive from paycheck to paycheck right now.

The general rule of thumb has always been to have $1000 on hand, but how many people can swing that these days? I can tell you that when we went through Hurricane Ian, we needed cash for everything because we went weeks with little to no electricity.

People would wait in line for gas just to get to the pump and realize they couldn’t pay for it. $1000 was also pretty scary to have when law and order were going out the window. 

Starting a stockpile on a budget is easier than you think.

With a little planning, smart shopping, and a master list of essential items, you’ll build a stockpile that will keep your bank account happy. Remember, it’s all about taking small steps and making the most of every great deal you find. Happy stockpiling!

starting a stockpile with no money

50 Best Survival Foods to Stockpile for Families!

When it comes to stockpiling food for a survival situation, it’s important to prioritize foods that are non-perishable, provide essential nutrients, and have a long shelf life. The best survival foods are both non-perishable and are foods that your family will actually eat.Here are some of the best food options for long-term storage:

Canned Goods

Canned foods are an excellent choice due to their long shelf life, convenience, and variety. Look for canned meats (such as tuna, chicken, and beef), fruits, vegetables, and soups. Ensure the cans are undamaged and properly sealed. When it comes to stockpiling canned goods for a SHTF situation, it’s important to consider factors such as nutritional content, variety, and shelf life. Here are some key points to keep in mind:

  • Buy lots of different kids canned goods to ensure a balanced diet. Include options like canned meats (tuna, chicken, beef), fruits, vegetables, soups, and beans. No one wants to survive long on just kidney beans and fruit cocktail.
  • Nutritional Content: Look for canned goods that offer a good balance of macronutrients (carbohydrates, proteins, and fats) and essential micronutrients (vitamins and minerals). Choose low-sodium or no-salt-added options whenever possible to control your sodium intake.
  • Shelf Life: Canned goods typically have a long shelf life, but it’s essential to check the expiration dates before purchasing and regularly rotate your stockpile to ensure freshness. Most canned goods can last anywhere from 2 to 5 years or even longer, depending on the product.
  • Storage Conditions: Proper storage is crucial to maintain the quality and longevity of canned goods. Follow these guidelines:
    • Keep canned goods in a cool, dry place away from direct sunlight. Excessive heat or temperature fluctuations can shorten their shelf life.
    • Avoid storing cans near chemicals, cleaning supplies, or other potentially harmful substances that could affect the integrity of the cans.
    • Choose storage areas that are free from excessive moisture or humidity to prevent rusting or damage to the cans. This isn’t always easy to do in some climates – we live in Florida and it’s a struggle.
  • Inspection: Regularly inspect your canned goods for any signs of damage, such as bulging, rust, or dents. Don’t keep rusty or dented cans “just in case.” Pitch them and make a plan to replace them.
  • Organization: Create an organized system for your canned goods, arranging them by type and expiration date. This will help you keep track of your inventory and ensure that you use the oldest cans first.
  • Consumption: While canned goods have a long shelf life, it’s still a good to consume them before the expiration date for the best taste and quality. Rotate your stockpile by using and replacing older cans with fresh ones to avoid waste. Nutritional content can also diminish over time. Something to keep in mind.

Dried Beans and Legumes

Foods like lentils, chickpeas, white rice, brown rice, quinoa, and oats are nutrient-dense and can provide sustained energy. They have a long shelf life when stored in airtight containers and can be a valuable source of protein and carbohydrates. Stockpiling dry goods like beans and legumes is a smart choice for a survival situation. They are highly nutritious, versatile, and can provide a reliable source of protein, fiber, and carbohydrates. Here’s what you need to know about stocking up on dry goods:

Aim to have a variety of beans and legumes in your stockpile to avoid flavor fatigue. Consider options like black beans, kidney beans, lentils, chickpeas, and split peas. We buy ours in 25 or 50 lb bags from Azure Standard and store them in 5 gallon food-safe buckets.

Shelf Life: Dry beans and legumes have an impressively long shelf life when stored properly. They can last anywhere from 2 to 10 years or more, depending on the type and storage conditions.

Packaging: Purchase dry beans and legumes in sealed packaging, preferably from reputable brands. This ensures their freshness and reduces the risk of insect infestation or moisture damage.

Storage Containers: Transfer your dry beans and legumes to airtight containers for long-term storage. Mason jars, food-grade plastic containers, or Mylar bags with oxygen absorbers are all great options. Beware of rodents and bugs – glass or metal storage is best.

Storage Conditions: To maximize shelf life, store your dry goods in a cool, dark, and dry location. Avoid exposure to sunlight, heat, moisture, and fluctuating temperatures, as these factors can accelerate deterioration. A pantry or basement storage area is ideal.

Rotation: While dry beans and legumes have a long shelf life, it’s a good practice to rotate your stockpile regularly. Use the oldest supplies first and replenish with fresh ones.

Preparation: Dry beans and legumes require soaking and cooking before consumption. Typically the older your dried beans and legumes, the longer you’ll have to cook them. 

Quantity: when I see a sale on dried beans, I stock up. I feel like you can never have too many.

Seasonings and Flavorings: Enhance the taste and variety of your meals by including complementary seasonings like salt, pepper, spices, and herbs in your stockpile. These can make your bean and legume dishes more enjoyable and satisfying.

Keep in mind what an effort it takes to actually cook beans from dried. Yes, they store incredibly well and are healthy and inexpensive. The downside is the amount of water, time, and cooking fuel it takes to produce a meal from them. Just don’t rely completely on dried beans simply because they’re arguably the cheapest food to stockpile. Add plenty of their canned counterparts to have a well-rounded stockpile.

Pasta

Dry pasta has a remarkably long shelf life when stored properly. Sealed and unopened packages of pasta can last for one to two years or even longer, depending on the type and storage conditions.

To maintain the quality and extend the shelf life of pasta, store it in a cool, dry place away from direct sunlight and moisture. Airtight containers or resealable bags can help prevent exposure to air and potential infestation.

Pasta is a good source of carbohydrates, which provide energy. It is often enriched with vitamins and minerals like iron and B vitamins. Pairing pasta with other nutrient-dense ingredients can enhance its nutritional value in meals.

After Hurricane Ian, my family and I were without power for a week. Cooking dry beans just wasn’t happening, but we ate our fair share of pasta and gave our kids more macaroni and cheese than I’d like to admit. When a survival situation happens, especially when widespread damage and power outages are involved, you resort to the unhealthy options faster than you’d think because your time is spent helping your loved ones put their lives back together. Plan for the unexpected.

Dehydrated or freeze-dried foods

These foods undergo a preservation process that removes moisture while retaining most of their nutrients. Dehydrated or freeze-dried fruits, vegetables, meats, and even complete meals are available in stores and can be rehydrated with water. These probably don’t make a regular appearance on your dinner table, but it’s a good idea to stockpile them AND to use some of them now to get familiar with them before you need them. The best survival foods are those that store well and aren’t completely foreign when it comes time to use them.

Rehydrating Dehydrated Foods:

  1. Water: Rehydrating dehydrated foods typically involves adding water. The amount of water needed varies depending on the food item and desired consistency. Follow the instructions on the packaging or use recipes specific to the food you’re rehydrating.
  2. Cold Water Method: Place the dehydrated food in a bowl and cover it with cold water. Let it soak for the recommended time, usually around 15 to 30 minutes, or until it reaches the desired tenderness. Drain any excess water before using.
  3. Hot Water Method: Boiling water is often used for rehydrating foods like soups, stews, or pasta. Add the dehydrated food to a pot of boiling water and let it cook until tender, following the instructions provided. Drain excess water if necessary.

Popular Options to Buy:

  1. Dehydrated Fruits: Common dehydrated fruits include apples, bananas, strawberries, mangoes, and raisins. They are delicious as snacks, can be added to cereals or trail mixes, or rehydrated for use in baked goods.
  2. Dehydrated Vegetables: Popular dehydrated vegetables include carrots, peas, corn, onions, and bell peppers. They can be used in soups, stews, casseroles, or as ingredients in sauces and dips.
  3. Dehydrated Meats: Dehydrated meats like beef, chicken, or turkey can be used for adding protein to meals or for making jerky. They are lightweight and convenient for camping or emergency situations.
  4. Dehydrated Grains and Pasta: Dehydrated grains such as rice, quinoa, or oats, as well as dehydrated pasta, are popular options for quick and easy meal preparation. They rehydrate relatively quickly and can be used in various recipes.
  5. Dehydrated Soup Mixes: Dehydrated soup mixes are often available in a variety of flavors. They usually contain a combination of dehydrated vegetables, grains, and seasonings. Just add water and heat to enjoy a comforting bowl of soup.
  6. Dehydrated Meals: Pre-packaged dehydrated meals are available in a wide range of options, including pasta dishes, rice bowls, curries, and more. They often contain a combination of dehydrated proteins, vegetables, and seasonings, providing a complete meal solution.

Nuts, seeds, and nut butter

High in healthy fats, protein, and fiber, these items provide essential nutrients and can be stored for an extended period. Consider options like almonds, walnuts, chia seeds, and peanut butter.

Shelf-stable milk and dairy alternatives

Look for UHT (Ultra High Temperature) processed milk, condensed milk, or powdered milk. Non-dairy alternatives like almond milk or soy milk may also be suitable options, especially if you have dietary restrictions. Fresh milk is our kids’ absolute favorite, but we’ve started to use powdered milk on occasion to get them used to the taste.

Dairy Alternatives:

Plant-based Milk: Plant-based milk alternatives such as almond milk, soy milk, oat milk, or coconut milk can be stored in cartons or Tetra Paks. These dairy-free options are typically available in both refrigerated and shelf-stable formats. The shelf-stable versions have a longer shelf life and are suitable for stockpiling. They can be used as substitutes for regular milk in various recipes, cereals, beverages, or enjoyed on their own.

Powdered Milk Alternatives: Powdered milk alternatives like powdered soy milk, almond milk, or coconut milk are available in the market. They are convenient for long-term storage as they have a significantly extended shelf life. These can be reconstituted with water to create a milk-like beverage or used in cooking and baking.

Shelf-Stable Dairy:

UHT Milk: Ultra-high temperature (UHT) milk, also known as long-life milk or boxed milk, undergoes a process that extends its shelf life without refrigeration until it’s opened. It is available in whole, low-fat, or skim varieties and can be used as a substitute for regular milk in recipes, cereals, and beverages.

Canned Evaporated Milk: Evaporated milk is a concentrated form of milk with a thick consistency. It is commonly sold in cans and can be used as a substitute for regular milk in recipes that call for a creamier texture, such as desserts and sauces.

Canned Sweetened Condensed Milk: Sweetened condensed milk is thick and sweet, with a caramelized flavor. It is commonly used in baking, desserts, and coffee. Canned sweetened condensed milk has a long shelf life and can be stored in your stockpile.

Shelf-Stable Cheese: Some types of cheese, such as processed cheese or certain hard cheeses like Parmesan, have a longer shelf life and can be stored at room temperature. However, it’s important to check the specific storage requirements for each type of cheese.

When stocking dairy alternatives and shelf-stable dairy products, consider the expiration dates and rotate your stockpile accordingly. It’s also important to note that these alternatives may have different tastes and textures compared to traditional dairy products, so try them before stocking up on too many.

Cooking oil

Choose oils with a long shelf life, such as coconut oil, olive oil, or vegetable oil. They are versatile for cooking and can provide additional calories. Oils that have undergone processes like refining or hydrogenation generally have longer shelf lives.

Opt for oils that are stable at high temperatures, as they can be used for various cooking methods like frying, sautéing, or baking without breaking down and producing harmful compounds. Oils with higher smoke points, such as avocado oil, peanut oil, or refined coconut oil, are more suitable for high-heat cooking. There are also oils, like sesame oil, that are delicious but should be used as a finishing oil and not used over heat at all.

Energy bars and granola bars

These compact snacks are convenient and can provide a quick energy boost. They’re great if you have to travel during SHTF and are usually an easy sell for even the pickiest kids.  Look for options with whole grains, nuts, and dried fruits for a slightly healthier granola bar. The downside is the shorter shelf life, but these are pretty easy to rotate through. Our favorites right now are any flavor of Z bar from Clif bars.

Spices, salt, and sugar

Please please please don’t underestimate the importance of spices and sauces in your stockpile. Can you survive on nothing other than plain pinto beans and rice? Sure, but would you want to? Keep things like maple syrup and brown sugar on hand to be used in oatmeal, tomato sauces to season and use on pastas and over rice, and bouillon cubes for adding flavor to dried beans and legumes while cooking.

Salt is an essential spice to stockpile due to its multiple uses. Not only does it enhance the taste of food, but it also helps preserve food and can be used for various purposes such as curing, brining, and pickling. Salt is also necessary for maintaining electrolyte balance in the body. Consider storing both iodized table salt and non-iodized salt, like Celtic and pink Himalayan salt.

Common Spices: Include a variety of commonly used spices such as black pepper, garlic powder, onion powder, paprika, chili powder, cinnamon, cumin, oregano, basil, and thyme. These spices can be found at any grocery store and are a really cheap way to brighten up dishes.

Herbs: Dried herbs like parsley, rosemary, sage, and bay leaves can provide aroma and flavor to your meals. They are versatile and can be used in soups, stews, sauces, and marinades.

Spice Blends: Consider stocking pre-made spice blends such as curry powder, Italian seasoning, taco seasoning, or garam masala. These blends offer a convenient way to add complex flavors to your meals without needing to mix individual spices.

Hot Sauces and Chili Flakes: For those who enjoy spicy flavors, hot sauces or chili flakes can be valuable additions. They can provide heat and intensity to dishes, and their long shelf life makes them suitable for stockpiling.

Sweeteners: While not technically spices, sweeteners like sugar, honey, and maple syrup can be important for adding sweetness to baked goods, beverages, or savory dishes that require a touch of sweetness. When using up all of those canned tomatoes, you’ll need sugar to help balance out the acidity, for example.

Water

While not technically a food item, having a sufficient supply of clean drinking water is crucial for survival. Not to mention that every item on this list requires water in one way or another. Make sure you have an appropriate means of water storage, such as large water containers or water purification systems. Adding apple cider vinegar to water can help boost your immune system, drink mixes that contain vitamin C are a great way to get some added health benefits while increasing water intake – especially in kids.

List of Foods to Stockpile

A quick list of foods to get started on an emergency stockpile, especially for families beginning to prep on a strict budget:

  1. Canned meats (tuna, chicken, salmon)
  2. Canned beans (black beans, kidney beans, chickpeas)
  3. Canned vegetables (corn, peas, green beans, carrots)
  4. Canned fruits (peaches, pears, pineapple)
  5. Canned soups and broths
  6. Canned pasta sauces
  7. Canned tomatoes and tomato sauce
  8. Pasta (spaghetti, macaroni, penne)
  9. Rice (white rice, brown rice)
  10. Quinoa
  11. Oats
  12. Cereal
  13. Granola bars or protein bars
  14. Nuts and seeds (almonds, peanuts, sunflower seeds)
  15. Dried fruits (raisins, cranberries, apricots)
  16. Peanut butter or other nut butters
  17. Shelf-stable milk (UHT milk or powdered milk)
  18. Cooking oil (vegetable oil, olive oil)
  19. Crackers or rice cakes
  20. Instant noodles or ramen
  21. Bouillon cubes or soup mixes
  22. Salt, pepper, and other spices
  23. Sugar or sweeteners (white sugar, brown sugar, honey)
  24. Multivitamins or dietary supplements
  25. Water (bottled water or water purification tablets)

Remember to regularly check and rotate your stockpile to maintain freshness and ensure that you consume the items before their expiration dates. It’s easy to get caught up in the excitement of collecting non-perishable foods and feeling like you’re prepared for whatever zombie apocalypse comes our way. The best way to actually build a food supply in your home is to stock pile excess amounts of what you already use, rotate through it, and replace it when you use it. Don’t just store canned tomatoes for years on end with the only intention of using them in case of a food storage. Instead, have a large (and hopefully growing) working pantry. Develop your skills. Learn to make your own bread. Try a variety of foods that you can either easily source or grow yourself. Become more self-sufficient while also becoming less picky. Raise your kids to do the same. The best way to prepare for hard times is to stockpile during ideal conditions and build up mental and physical stamina for whatever lies ahead.
25 Bushcraft Fire Starting Techniques

Arguably the most important part of a survival situation is the ability to make a fire. Anyone can create some sort of makeshift shelter to protect themselves from the elements. It takes skill to create a fire – especially to create a fire without matches or a lighter. Let’s talk about 25 bushcraft fire starting techniques that you can actually use.

  1. Bow Drill:
    • Create a bow using a flexible, curved stick and a strong cord.
    • Carve a spindle and a fireboard from dry wood.
    • Place the fireboard on the ground and hold it steady.
    • Attach the spindle to the bowstring and place it on the fireboard.
    • Use the bow to rotate the spindle back and forth, creating friction that generates an ember on the fireboard.
    • Transfer the ember to your prepared tinder bundle and blow gently to ignite it into a flame.
  2. Hand Drill:
    • Carve a spindle and a fireboard from dry wood.
    • Place the fireboard on the ground and hold it steady.
    • Hold the spindle between your hands and apply downward pressure.
    • Begin rotating the spindle back and forth between your hands, creating friction that generates an ember on the fireboard.
    • Transfer the ember to your prepared tinder bundle and blow gently to ignite it into a flame.
  3. Flint and Steel:
    • Hold the steel firmly in one hand and the flint in the other.
    • Position the flint at an angle, with the edge facing the tinder.
    • Strike the steel against the flint, directing the sparks toward the tinder.
    • Aim to catch the sparks in the tinder, creating an ember.
    • Transfer the ember to your prepared kindling and blow gently to ignite it into a flame.
  4. Solar Ignition:
    • Find a magnifying glass or a water-filled plastic bag.
    • Position it at an angle to concentrate sunlight onto your tinder.
    • Hold it steady and adjust the angle until the focused sunlight creates a hot spot on the tinder.
    • Wait for the tinder to catch fire and transfer it to your prepared kindling.
  5. Fire Plough:
    • Carve a groove into a fireboard using a sharp stick or knife.
    • Use a dry, flat piece of wood as the plough.
    • Rub the plough back and forth along the groove, exerting pressure and creating friction.
    • The friction generates heat, eventually creating an ember.
    • Transfer the ember to your prepared tinder bundle and blow gently to ignite it into a flame.
  6. Fire Saw:
    • Create a notch in a fireboard and place it on the ground.
    • Take a dry, flat piece of wood and saw back and forth against the fireboard notch.
    • The friction and heat generated eventually create an ember.
    • Transfer the ember to your prepared tinder bundle and blow gently to ignite it into a flame.
  7. Fire Piston:
    • Load a fire piston with a small piece of tinder or char cloth.
    • Rapidly push the piston into the cylinder to create compression and heat.
    • The heat causes the tinder or char cloth to ignite.
    • Transfer the ember to your prepared kindling and blow gently to ignite it into a flame.
  8. Fire Roll:
    • Collect dry and fibrous materials like bark, grass, or plant fibers.
    • Roll the materials tightly together into a long, thin rope-like structure.
    • Hold one end of the roll and rapidly spin it against a hard surface to create friction and heat.
    • The friction generates an ember within the roll.
    • Transfer the ember to your prepared kindling and blow gently to ignite it into a flame.
  9. Fire Thong:
    • Cut a flexible branch or cord and create a bow-like structure.
    • Attach a short, curved piece of wood to the bowstring, creating a thong.
    • Place a dry, flat piece of wood on the ground as the fireboard.
    • Hold the fireboard steady and use the thong to rapidly saw back and forth on the fireboard, creating friction and heat.
    • The heat generated creates an ember on the fireboard.
    • Transfer the ember to your prepared tinder bundle and blow gently to ignite it into a flame.

  1. Fire Steel and Char Cloth:
    • Prepare a piece of char cloth by charring a small piece of natural fabric until it becomes black and carbonized.
    • Hold the char cloth close to the tinder.
    • Strike the fire steel against a hard surface, directing the sparks onto the char cloth.
    • The sparks will ignite the char cloth, creating an ember.
    • Transfer the ember to your prepared kindling and blow gently to ignite it into a flame.
  1. Fire Straws:
  • Obtain pre-made fire straws or make your own by tightly rolling a piece of paper or cardboard into a straw-like shape.
  • Stuff the straws with dry tinder materials like cotton balls, dryer lint, or char cloth.
  • Seal the ends of the straws with wax or by folding them over.
  • When ready to start a fire, simply light one end of the fire straw with a match or lighter.
  • The tinder inside the straw will catch fire, providing a flame to ignite your kindling.
  1. Fire from Ice:
  • Find a block of ice and shape it into a lens-like shape using a knife or by rubbing it against a hard surface.
  • Position the ice lens to focus sunlight onto your tinder.
  • Adjust the angle and distance to concentrate the sunlight into a hot spot on the tinder.
  • Wait for the tinder to catch fire and transfer it to your prepared kindling.
  1. Fire from a Battery and Steel Wool:
  • Gather a 9-volt battery and a fine-grade steel wool.
  • Hold the steel wool against the battery terminals.
  • The electrical current passing through the steel wool will cause it to heat up and eventually catch fire.
  • Transfer the burning steel wool to your prepared kindling to start the fire.
  1. Fire from a Magnesium Block:
  • Scrape off some shavings from a magnesium block using a knife or a sharp edge.
  • Create a small pile of magnesium shavings on top of your tinder.
  • Use a ferrocerium rod or a lighter to ignite the magnesium shavings, as they burn at extremely high temperatures.
  • Once the magnesium is burning, it will ignite your tinder, and you can add kindling to build the fire.
  1. Fire from a Spark-Lite:
  • Obtain a Spark-Lite or a similar spark-emitting device.
  • Attach a small piece of char cloth or a cotton ball to the end of the Spark-Lite.
  • Strike the Spark-Lite against a rough surface, directing the sparks onto the char cloth or cotton ball.
  • The sparks will ignite the char cloth or cotton ball, creating an ember.
  • Transfer the ember to your prepared kindling and blow gently to ignite it into a flame.
  1. Fire from a Fire Syringe:
  • Load the fire syringe with a small piece of tinder or char cloth.
  • Rapidly push the plunger into the syringe barrel to create compression and heat.
  • The heat causes the tinder or char cloth to ignite.
  • Transfer the ember to your prepared kindling and blow gently to ignite it into a flame.
  1. Fire from a Light Bulb:
  • Carefully break open a light bulb, being cautious of the glass.
  • Extract the filament, ensuring it remains intact.
  • Use a battery or other power source to heat up the filament until it glows red-hot.
  • Transfer the glowing filament to your prepared tinder bundle, igniting it and eventually building the fire.
  1. Fire from a Coke Can and Chocolate:
  • Polish the bottom of an empty, aluminum soda can to create a reflective surface.
  • Melt a small piece of chocolate and spread it onto the polished surface of the can.
  • Use the reflective surface to concentrate sunlight onto your tinder, igniting it.
  1. Fire from a Fire Plunger:
  • Assemble a fire plunger kit, consisting of a hollow tube, a plunger, and a rubber gasket or piston.
  • Load the tube with a small piece of tinder or char cloth.
  • Quickly push the plunger down into the tube, compressing the air and creating heat

20. Fire from Chemical Reaction:

  • Mix potassium permanganate and glycerin in a small container.
  • The combination of these chemicals creates a rapid exothermic reaction, generating heat and igniting the surrounding materials.
  • Place the mixture onto a bed of dry tinder or directly onto the kindling.
  • Ensure proper ventilation and stand back as the reaction occurs and the fire starts.
  1. Fire from a Flashlight Reflector:
  • Unscrew the reflector from a flashlight.
  • Polish the reflective surface to a high shine.
  • Position the reflector at an angle to concentrate sunlight onto your tinder.
  • Adjust the angle until the focused sunlight creates a hot spot on the tinder.
  • Wait for the tinder to catch fire and transfer it to your prepared kindling.
  1. Fire from a Fire Roll (made with natural fibers):
  • Gather dry, fibrous materials like bark, grass, or plant fibers.
  • Roll the materials tightly into a long, thin rope-like structure.
  • Hold one end of the roll and rapidly spin it against a hard surface to create friction and heat.
  • The friction generates an ember within the roll.
  • Transfer the ember to your prepared tinder bundle and blow gently to ignite it into a flame.
  1. Fire from a Hand Sanitizer and Spark Source:
  • Apply a small amount of hand sanitizer to your tinder.
  • Create sparks using a flint and steel, ferrocerium rod, or other spark-emitting device.
  • Direct the sparks onto the hand sanitizer-soaked tinder.
  • The hand sanitizer will quickly catch fire, providing a flame to ignite your kindling.
  1. Fire from a Battery and Foil Gum Wrapper:
  • Cut a foil gum wrapper into a thin strip.
  • Touch one end of the strip to the positive terminal of a battery.
  • Touch the other end of the strip to the negative terminal of the battery, creating a circuit.
  • The resistance in the circuit causes the strip to heat up and eventually catch fire.
  • Transfer the burning strip to your prepared kindling to start the fire.
  1. Fire from Char Cloth and Friction:
  • Prepare char cloth by charring a small piece of natural fabric until it becomes black and carbonized.
  • Place the char cloth onto the fireboard or tinder bundle.
  • Use friction-based fire-starting methods like the bow drill or hand drill to create an ember on the char cloth.
  • Transfer the ember to your prepared kindling and blow gently to ignite it into a flame.

There are plenty of ways to start a fire to create warmth and to cook a meal for yourself and your family. Before you have to, practice these bushcraft fire starting methods in a safe setting and hone your skills. Always remember, the time to practice survival skills isn’t in a survival situation. Also remember that I am not an expert and to obey your local laws and regulations when it comes to fire starting and safety.The best fire is a safe fire. Do your due diligence and develop those skills!

easy fire starting methods

© 2026

Theme by Anders NorenUp ↑